Advanced Animation - Exercise

Lee Yu Hui | 0335787
Advanced Animation
Exercises
Lectures
Week 1
We were introduced to animation in Maya by Mr. Kannan. For our first exercise, we were required to familiar ourselves with the animation settings in Maya by animating movement of three different balls.
I picked bowling ball, soccer ball and basketball as my reference for animation. I had to look for video references online and understand their physics so that I could accurately animate their movement.
Week 2
Animating the ball was much harder than expected as I find it hard to mimic the real movement of the ball. There's a lot to take into consideration when animating the ball, for example the height of the ball and etc. Mr Kannan gave us some suggestions to improve the animation movement.
Basketball Animation
Bowling Ball Animation
Soccer ball Animation
For the lecture session, Mr. Faizal asked us to create a series of characters using basic shapes. He showed us some references and he also showed us how he drew them in Adobe Animate.
Below is the reference that he gave us:

Character design image reference
With the reference given, I tried to draw out my own version of the characters using basic shapes. I used Photoshop to sketch out the characters as I think its easier and I have more control over the pen pressure. Below is my version of the sketch:

Character design sketch
I showed it to Mr. Faizal before I start to apply colors to the characters. He said it looks good overall, and that the characters looked like they have their own personality. I then proceeded to color the characters in Photoshop.

Character design - colored version
After I'm happy with the colors, I proceeded to show it to Mr. Faizal. Overall he's quite pleased with the end results, and I'm happy that he liked it. Nevertheless, he did say that I could try to use the normal pen brush instead of a textured one so that the lines would look smoother.
For this weeks tutorial we started to learn about graph editor in Maya. Learning how the graph editor works and functions is much harder than anticipated, as it is different from what we've learnt before.
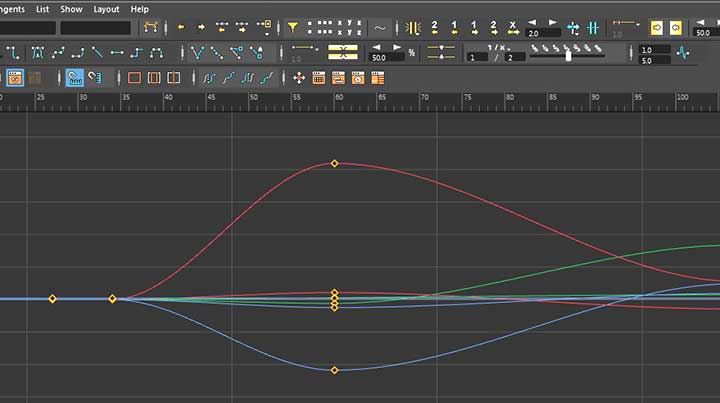
Graph editor in Maya
Mr. Kannan gave us a pendulum template that he created, and he wanted us to play around with it. We learned to use Hypergraph Hierarchy to parent certain objects, so that it would help out during the animation process.
Below is my take on the pendulum animation:
Mr. Kannan commented that my animation was too fast and I should try to slow it down.
Week 4
For this weeks lecture, we were asked to design and create our characters back again in Adobe Animate to make the character turnaround and create 5 different action and poses.
Adobe Animate is considered quite new to me and I didn't think that drawing in Animate would be quite different from drawing in Photoshop. I had less control of the pen pressure in Adobe Animate and to be frank, I had a hard time trying to control the pen pressure in Animate.

Working in Adobe Animate
Below is my character turnaround that I drew in Adobe Animate. I ended up chose to do the tofu-shaped character as I think it has a lot of personality in it and I could play around with its "hair" when it comes to animation.

Character turnaround
I've also animated the character turnaround in Adobe Animate:

Character turnaround animation
I've also drawn 5 different emotions based on the same character:

Character emotions
It took me a while to get it done as I'm not used to drawing in Adobe Animate. Though I think I could improve more on the posture of each characters, but I'm overall quite happy with the end results with the time limitations given to us.
Week 5
For this weeks tutorial class, Mr. Kannan gave us a flour sack rig and showed us how to play around with the rig to bring life to the character.

Tutorial in Maya
After playing around with the rig, I notice that the rig isn't really hard to understand, however it is challenging to create a life-like character animation as there are a lot of details that we need to keep in mind when animating the character.
As for this weeks lecture, we were requested by Mr. Faizal to create a walk, run and jump cycle for the characters. The key to creating these cycles is that we have to make sure the key poses is drawn out, and therefore it'll create an illusion where the characters are moving.
Below are the cycles that I drew and animated in Adobe Animate:

Jump cycle

Walk cycle

Run cycle
Week 6
This week I focused on creating the background for the animation as I didn't know that we needed to create a background previously. Mr. Faizal also gave me some feedback on the walk and run cycle as both of them looked off. Mr. Faizal mentioned that the legs posture were wrong and the hands shouldn't flip like that in the run cycle. I proceeded to make further amendments and updated the animation.

Run cycle - Updated

Walk cycle - Updated
As for the background, I've created a few sketches in Photoshop.

Sketch #1

Sketch #2

Sketch #3

Sketch #4

Sketch #5
Overall I had fun creating the environment background for the animation as I've always wanted to try it out. Though I'm not good at it, I still had fun drawing them in the process. After showing Mr. Faizal the sketches, he asked me to proceed to color it.

Background - Colored
As I'm not really good at coloring and I have not much knowledge on the color studies in environment, I try to look for references online and take inspiration from it. I'm quite happy at how it turned out, though there's definitely parts that I could improve on.
With the background done, I also proceed to apply them into the animation.

Jump cycle- Final

Run cycle - Final

Walk cycle - Final


Comments
Post a Comment